
As you guys know I now offer advertisement slots in my sidebar to bloggers and businesses, but the most common query my advertisers have is ‘How to make a blog button?’, and due to this half the time I myself am either coding or fixing things for them. Not that I mind, but having a button (a linked image logo) is a great way of increasing the reach of your blog so everybody should know how to make their own as you can use this button for advertising or swapping with your blog buddies. A lot of you guys showed interest when I mentioned in my previous posts about this blog button tutorial so I hope you learn something new today!
Before we begin, in case you are wondering what blog advertising is all about, don’t you worry because I have got you covered on that too. Click here for a detailed post on how you can advertise your blog on another blog.
1) Design
So, you are not a pro with graphics? No problem! Anybody can easily design their blog’s logo on Picmonkey.

Step 1: Go to design and select a background canvas for your logo from the given options.

Step 2: Do whatever you like. Let your imagination run wild. Use overlays and fonts for the basic designing.

Step 3: Once you are happy with your design, it’s time to resize. Here’s a little tip, if you have to make your button of a certain size, it is always better to design it on a full-size canvas, though bear the required shape in mind, and then resize. You can easily do so by going to the resize option on Picmonkey and type in your dimensions. I resized this sample button to a 200×200.

Step 4: Save the designed button logo on your computer.
2) Code
Here comes the part people struggle with the most, the coding. When I started out I had zero knowledge of HTML coding, but with time and practice, I got the hang of it. I am still not anywhere near perfection, but I can read and fix codes. It is not difficult at all, and to make it easier for you, I have already put down the code below.
To show you the coding I have used the code and the image link of my original button rather than the designed logo so do not get confused.
Your button code has three main parts; blog name, blog link and the image link of the button that you just designed.

Step 1: You cannot directly use the image of your button for the code as it works with links. In order to turn that image into a link, go to Photobucket and either make an account or log in using your Facebook or Twitter account.

Step 2:
Upload the button image, then copy the direct link of the image to use in your code.
Full code for your sidebar:
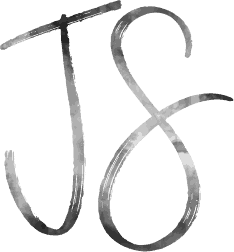
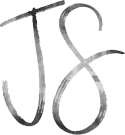
<div align=”center” style=”padding: 5px;”><img src=”http://i1295.photobucket.com/albums/b627/Jadirah_Sarmad/jcbsmallblogbutton_zpsfa68a016.png” title=”Jasmine Catches Butterflies” alt=”Jasmine Catches Butterflies” /></div><pre style=”background: none; border: none; padding: 0;”><textarea style=”background:#f0f0f0;border: solid 1px #cccccc; color: #777777; font-size:100%; height: 50px; margin:auto; text-align: left; padding: 7px 0 2px 5px; display: block; width: 90%;”><div align=”center”><a href=”http://www.jasminecatchesbutterflies.com” title=”Jasmine Catches Butterflies”><img src=”http://i1295.photobucket.com/albums/b627/Jadirah_Sarmad/jcbsmallblogbutton_zpsfa68a016.png” alt=”Jasmine Catches Butterflies” style=”border:none;” /></a></div></textarea></pre>
Replace the image link in pink with your own image’s direct link.
Replace the text in blue with the name of your own blog.
Replace the URL in green with the URL of your blog.
This is the complete code that you can install in your sidebar. Do note that a portion of it appears twice here as once you upload it in your own sidebar, the top part of the code will appear as the photo while the bottom part will appear in a box with the copiable code for others to use. However, if you have to give the code to someone else directly, just use the following part.
Code to share with others directly:
<div align=”center”><a href=”http://www.jasminecatchesbutterflies.com” title=”Jasmine Catches Butterflies” target=”_blank”><img src=”http://i1295.photobucket.com/albums/b627/Jadirah_Sarmad/jcbsmallblogbutton_zpsfa68a016.png” alt=”Jasmine Catches Butterflies” style=”border:none;” /></a></div>
3) Upload

I am only familiar with Blogger platform so sorry WordPress peeps, I won’t be able to guide you here. If you are on Blogger, go to layout, click on add gadget wherever you want to place your button, select HTML/Javascript, paste the FULL CODE, save, Ta-da!

Don’t forget to enter my Potpourri Medium Ad. Space Giveaway! I have extended the date by two days so it will now end on 17th May at 11:59 PM Pakistan Time. Also, advertisement slot bookings for June are open, check here. 🙂 x


great tutorial, many people don't know how to do that!
x,Abri
The Color Palette
Yes, I kept on getting questions about these so I decided to put together a tutorial. 🙂 x
Really helpful tutorial, I should really make a blog button!
The Velvet Black // UK Style & Beauty Blog
I'm glad you found this helpful. 🙂 x
I want a blog button but I want to be completely happy with my design first.. as it is, I have no proper nav bar 🙁
Ayre
If you need any help, I am always here. 🙂 x
Honey this is a very helpful post 🙂
Mission accomplished. 😉 x